
When you find puddles in your yard, your first instinct is probably to look down at the ground. But often, the real source of the problem is located overhead. Your roof collects an enormous amount of water during a storm, and your gutter system is responsible for managing it all. If your gutters are clogged, damaged, or undersized, they can dump thousands of gallons of water right next to your foundation, creating the very issues you’re trying to solve. Before you start digging trenches, it’s critical to understand this link. This guide explores a full range of yard drainage solutions, starting at the source.
Key Takeaways
- Check Your Gutters First: Before planning any major yard work, confirm your gutters are clean and working properly. Faulty gutters are a primary cause of soggy lawns and foundation issues, so addressing them is often the most effective solution.
- Match the Solution to the Problem: A puddle is just a symptom, so find the real cause before you start digging. Whether you have compacted soil, poor grading, or a specific low spot determines if you need a French drain, a catch basin, or another targeted fix.
- Know When to Call for Help: While extending a downspout is a great DIY project, widespread water problems or issues with your yard's slope often require professional expertise. If you're facing a complex issue, calling an expert is the best way to protect your property.
Signs Your Yard Has a Drainage Problem
It’s easy to overlook the first signs of a drainage issue. A little puddle here or a muddy patch there might not seem like a big deal after a Texas downpour. But these small clues can point to a much larger problem brewing beneath the surface. When water doesn't flow away from your property as it should, it can lead to serious issues, from a ruined lawn to costly foundation damage. Recognizing the warning signs early is the first step toward protecting your home and landscape.
Think of your yard as a system. Every part, from the slope of the lawn to the gutters on your roof, plays a role in managing water. When one part fails, the whole system can get backed up. That's when you start seeing the telltale signs of trouble. Ignoring them won't make them go away; in fact, it usually makes the problem worse and more expensive to fix down the line. If you spot any of the issues we're about to cover, it’s time to take a closer look at your yard’s drainage. Our team can help you identify the root cause and find the right drainage solutions for your property, ensuring your home stays safe and dry.
Puddles and Soggy Spots That Won't Go Away
A little standing water after a heavy rain is normal, but if you have puddles that stick around for days, you have a drainage problem. These persistent soggy spots are a clear sign that water has nowhere to go. Instead of being absorbed into the ground or flowing away, it just sits, drowning your grass and creating a swampy mess. Serious yard drainage issues can result in standing water that will kill your garden and make lawn care nearly impossible. If your lawn squishes under your feet long after a storm has passed, pay attention. It’s one of the most obvious indicators that your yard isn't draining correctly.
Soil Erosion and Muddy Patches
Have you noticed bare spots where grass refuses to grow or small channels carved into your landscape? That’s a classic sign of soil erosion caused by uncontrolled water runoff. When water flows too quickly across your yard, it strips away valuable topsoil, leaving behind unsightly muddy patches. Sometimes, poor grading or compacted soil is to blame, preventing water from flowing naturally away from your house. This not only looks bad but also damages the health of your lawn by washing away essential nutrients. If you see dirt and mulch consistently washing onto your driveway or sidewalk, it’s a clear signal that your drainage needs attention.
Water Gathering Around Your Foundation
This is one of the most critical red flags for any homeowner. If you see water pooling around the base of your house, you need to act quickly. This often happens when gutters are clogged or downspouts release water too close to the home. That water can fall right next to your foundation and seep into the soil, creating immense pressure on your foundation walls. Over time, this can lead to cracks, leaks, and even severe structural damage, which is incredibly expensive to repair. Protecting your foundation is our top priority, so if you see water pooling near your home, contact us for an expert assessment.
A Sudden Increase in Pests
If your yard suddenly feels like a bug magnet, poor drainage might be the culprit. Standing water is a perfect breeding ground for mosquitoes, which can lay hundreds of eggs in a small, stagnant puddle. Soggy soil also attracts other pests like gnats and can even encourage termites to move closer to your home’s foundation. While you might not immediately connect an increase in bugs to your lawn’s drainage, it’s a common side effect. Too much water does more harm than good, creating an environment where pests thrive. Addressing the underlying water problem is a key step in making your yard comfortable and pest-free again.
Common Causes of Poor Yard Drainage
Figuring out why your yard turns into a swamp after every rainstorm is the first step toward a real solution. It’s often a combination of factors, but once you pinpoint the source of the problem, you can choose the right fix. Let’s walk through the most common culprits behind poor yard drainage so you can get to the bottom of your water woes.
Your Yard's Natural Slope (or Lack Thereof)
Sometimes, the problem is simply the lay of the land. An ideal yard has a gentle slope that guides rainwater away from your home’s foundation. If your property is completely flat, water has no clear path to escape and will just sit there, creating soggy, unusable patches. Even worse, if your yard slopes toward your house, you’re basically inviting water to pool against your foundation, which can lead to serious structural damage. Understanding your yard's topography is essential to diagnosing these issues.
Compacted Soil and Heavy Clay
Here in Texas, we’re no strangers to heavy clay soil. While great for some things, it’s not so great for drainage. Clay particles are tiny and pack together tightly, making it difficult for water to soak through. Over time, foot traffic, lawn equipment, and even the weight of rain can compact the soil even further, turning your lawn into a nearly impenetrable surface. When water can’t absorb into the ground, it has nowhere to go but to pool on top, creating those persistent puddles that can drown your grass.
Incorrect Property Grading
Beyond the natural slope, the way your property was graded during construction plays a huge role. Proper grading is meant to create that gentle slope away from your foundation, but not all builders get this right. If the land wasn't shaped correctly from the start, it can create low spots where water collects or direct runoff straight toward your home. This is a foundational issue that can cause persistent water problems. A professional can assess your property's grade and recommend effective drainage solutions to correct the flow of water.
Clogged or Ineffective Gutters
It’s easy to overlook your gutters when you’re focused on the ground, but they are often the primary source of yard drainage problems. Your roof collects a massive amount of water during a storm, and your gutter system’s job is to safely channel it away from your home. When gutters are clogged with leaves and debris, they overflow, dumping sheets of water right next to your foundation. Similarly, damaged or improperly installed downspouts can deposit water in all the wrong places. Before investing in complex yard drainage, make sure your gutter system is clean and functioning correctly.
8 Effective Yard Drainage Solutions
Seeing water pool in your yard can be incredibly stressful, especially when you start thinking about potential damage to your home’s foundation. The good news is that there are plenty of effective ways to manage excess water and protect your property. The key is matching the right solution to your specific problem. Some fixes are simple enough for a weekend project, while others are more complex and benefit from professional installation. Think of these options as a toolkit for reclaiming your yard from soggy spots and standing water. From simple downspout adjustments to sophisticated underground systems, we’ll walk through the best drainage solutions to keep your Texas yard dry and your foundation secure.
1. French Drains
A French drain is a hardworking, hidden solution for serious water issues. It consists of a slightly sloped trench filled with gravel and a perforated pipe. This system works by intercepting and collecting groundwater and surface water, then redirecting it away from your home’s foundation or other problem areas. Because they operate underground, French drains are an excellent choice for managing persistent soggy patches in your lawn or preventing water from seeping into your basement or crawl space. They are one of the most reliable methods to fix yard drainage issues without altering the look of your landscape.
2. Catch Basins
If you have a specific low spot in your yard that always turns into a puddle after it rains, a catch basin might be the perfect fix. Think of it as a drain for your lawn. A catch basin is a box installed underground with a grate on top that sits flush with the ground. When water flows into the low spot, it enters the basin through the grate and is then channeled away through an underground pipe. They are ideal for collecting water in targeted areas like under a downspout, at the bottom of a slope, or in a perpetually soggy part of your garden or patio.
3. Channel Drains
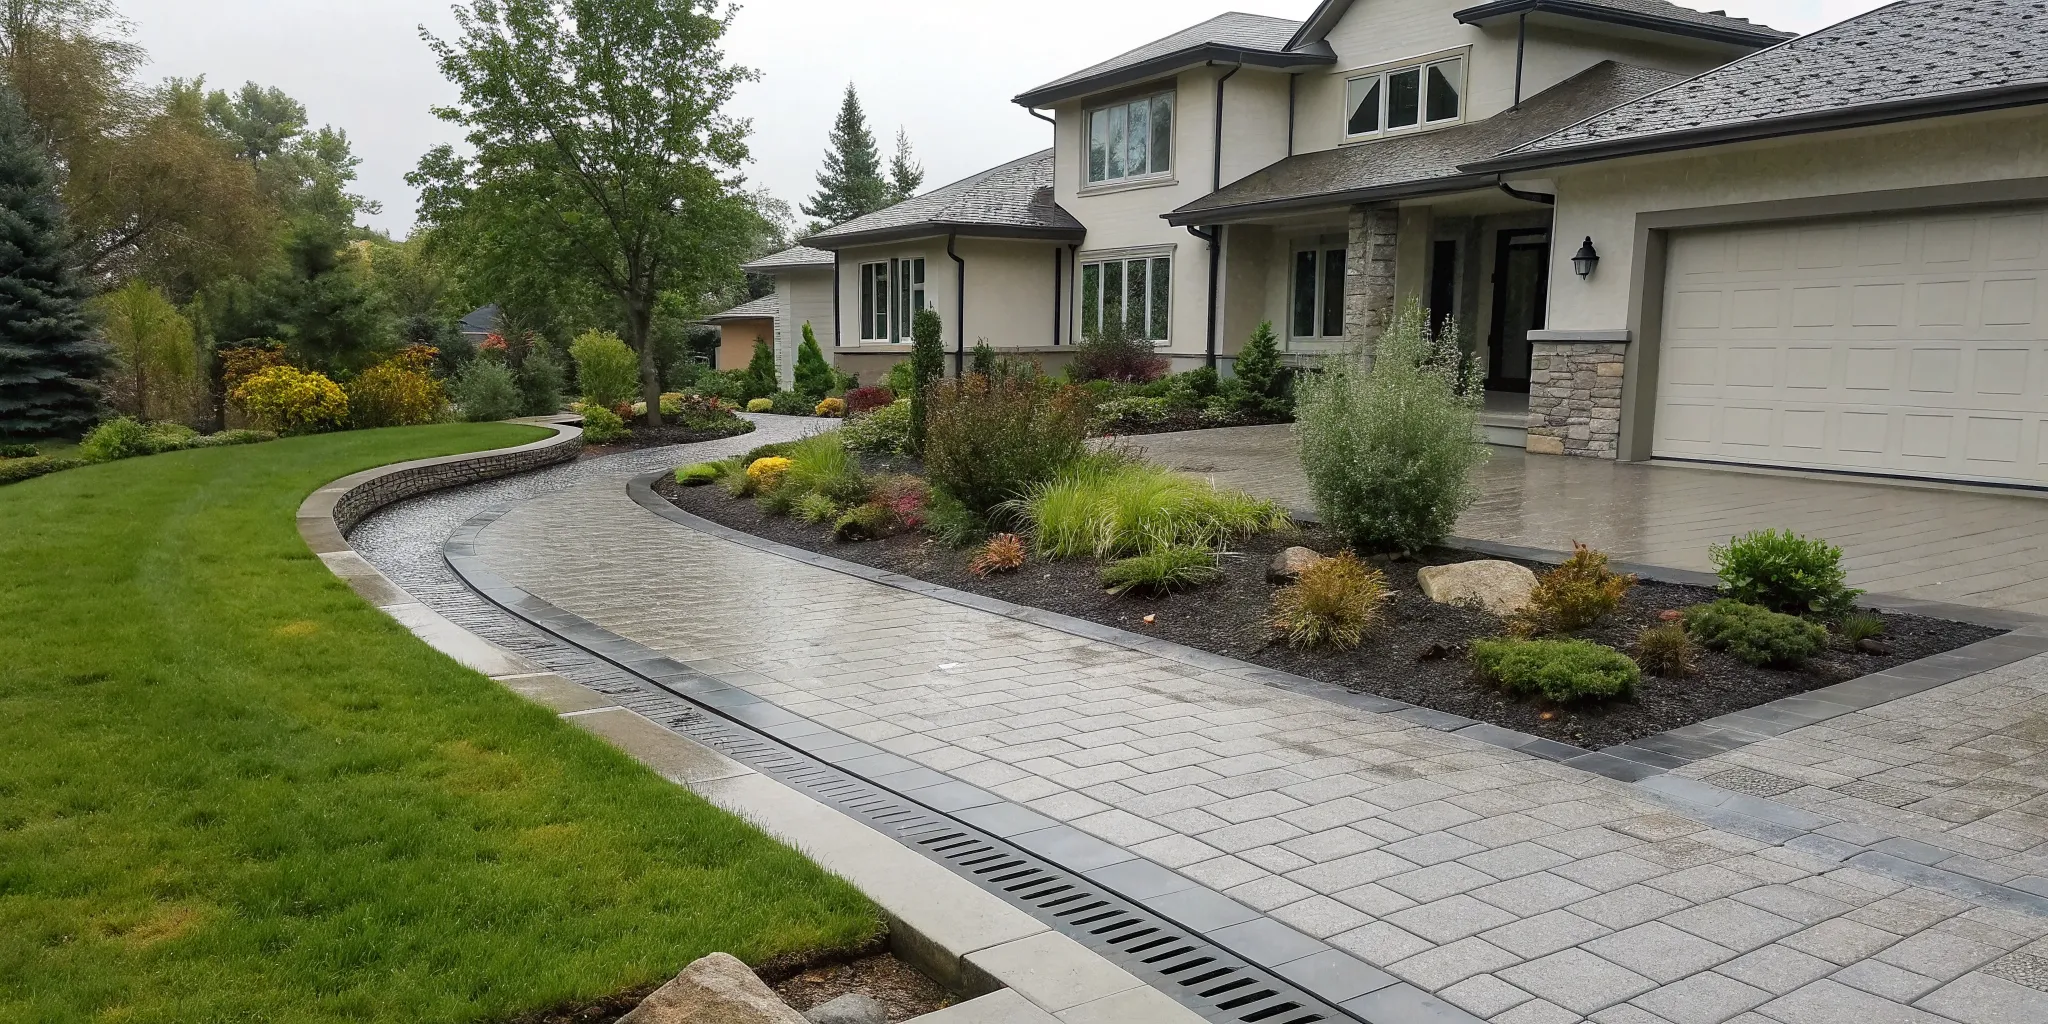
Also known as trench drains, channel drains are designed for paved surfaces like driveways, patios, and pool decks. You’ve likely seen them: long, narrow drains with a grate on top. They are installed flush with the pavement to intercept sheets of water flowing across the surface. This is especially important for preventing water from running into your garage or pooling against your home’s foundation. A channel drain acts as a linear barrier, effectively capturing and redirecting water before it can cause problems, making it a must-have for homes with sloped driveways.
4. Dry Wells
A dry well is an environmentally friendly solution for managing heavy rainwater runoff, particularly from your roof’s gutter system. It’s essentially a large, buried container with perforated sides that collects a high volume of water and allows it to slowly percolate into the surrounding soil. By connecting your downspouts directly to a dry well, you can prevent thousands of gallons of water from eroding your landscape or overwhelming your yard. This is a great option if you don’t have a convenient place to redirect water, as it keeps the runoff onsite and replenishes the groundwater table.
5. Swales and Dry Creek Beds
For a solution that blends seamlessly into your landscape, consider a swale or a dry creek bed. A swale is a shallow, wide, and gently sloped channel with grass or other vegetation that guides water across your yard. It’s a subtle way to control runoff using gravity. A dry creek bed serves the same function but is lined with stones and rocks for a more decorative, rustic look. Both are fantastic, natural-looking options for slowing down and redirecting water flow, and they can even become beautiful landscape features that add character to your property while solving a drainage problem.
6. Rain Gardens
A rain garden is a beautiful and eco-conscious way to handle runoff from roofs, driveways, and lawns. It’s a shallow depression planted with deep-rooted native plants and flowers that can handle both wet and dry conditions. When it rains, water collects in the garden and is slowly absorbed into the ground, getting filtered by the plants and soil along the way. This not only reduces the amount of runoff leaving your property but also helps prevent pollutants from entering local waterways. A rain garden can turn a soggy problem area into a vibrant habitat for pollinators while protecting your home from property damage.
7. Downspout Extensions and Rain Barrels
Sometimes the simplest solution is the most effective. If your gutters’ downspouts are releasing water right next to your foundation, you’re asking for trouble. Adding downspout extensions is an easy and inexpensive way to direct that water several feet away from your home. For an even more sustainable approach, connect a rain barrel to your downspout. Rain barrels collect rainwater that you can later use for your garden and plants, reducing water bills and conserving a precious resource. These DIY yard drainage solutions are a critical first line of defense in any home drainage plan.
8. Lawn Regrading and Aeration
If your yard has the wrong slope or compacted soil, water has nowhere to go but down, where it pools and creates a muddy mess. Lawn regrading involves reshaping the land to create a gentle slope that directs water away from your house. While it can be a major project, it’s often the only permanent solution for significant grading issues. On a smaller scale, lawn aeration can help with compacted soil. The process involves creating small holes in the turf, which allows water, air, and nutrients to penetrate deeper into the soil. This improves absorption and promotes a healthier, more resilient lawn.
How to Choose the Right Drainage Solution for Your Yard
Picking the right drainage solution feels a lot like being a detective. You have to gather clues about your property to find the real culprit behind your water woes. Before you start digging trenches or buying supplies, taking the time to investigate your yard’s specific needs will save you time, money, and a lot of headaches down the road. By working through these five steps, you can confidently identify the most effective and lasting solution for your home.
Step 1: Assess Your Yard's Slope
The first clue to look for is your yard's grade, or slope. Ideally, your yard should gently slope away from your house to guide rainwater away from the foundation. A proper grade prevents water from pooling against your walls and seeping into your basement or crawl space. A good rule of thumb is a drop of at least one inch for every foot of distance for the first 10 feet away from your home. You can check the slope yourself using some stakes and a line level. If your yard is flat or, even worse, slopes toward your house, regrading might be part of your overall solution.
Step 2: Pinpoint the Water Source
Next, you need to figure out where all that excess water is coming from. The best time to do this is during a steady rain. Grab an umbrella and take a walk around your property. Are your gutters overflowing? Are downspouts dumping water right next to your foundation instead of directing it away? Sometimes, the problem isn't the yard itself, but the systems designed to protect it. Clogged gutters or poorly placed downspouts are often the primary cause of drainage issues. Evaluating these components is a critical step before you invest in more complex drainage solutions.
Step 3: Test Your Soil
The type of soil in your yard plays a huge role in how well it drains. Here in Texas, many of us have dense, clay-heavy soil that doesn't absorb water quickly. When soil is tightly compacted, water has nowhere to go but sideways, often toward your home. You can get a feel for your soil by performing a simple percolation test. Dig a small hole about a foot deep, fill it with water, and time how long it takes to drain. If the water is still standing there hours later, you likely have poorly draining soil. Understanding your soil’s composition helps determine if you need a solution that moves water across the surface or one that helps it absorb into the ground.
Step 4: Consider Your Local Climate
Our Texas climate brings unique challenges, from long periods of drought to sudden, intense downpours that can overwhelm a property in minutes. Your drainage system needs to be able to handle these extremes. A solution that works in a climate with gentle, frequent rain might not be enough for a Central Texas thunderstorm. When planning, think about the heaviest rainfall your area typically gets. This will help you choose a system, like a French drain or a dry well, that has the capacity to manage a large volume of water quickly and efficiently. Planning for the worst-case scenario ensures your home stays protected when the next big storm rolls in.
Step 5: Align with Your Budget and Upkeep Goals
Finally, it’s time to think about the practical side of things: your budget and how much maintenance you’re willing to do. Some solutions, like extending your downspouts or creating a simple rain garden, are affordable and DIY-friendly. Others, such as installing a French drain system or regrading your entire yard, are more complex and costly, requiring professional equipment and expertise. Be honest with yourself about what you can afford and how much time you want to spend on upkeep. For larger projects, it’s always a good idea to get a professional estimate to understand the full scope and cost before you commit.
A Step-by-Step Guide to Installing a French Drain
A French drain is one of the most effective ways to redirect excess water away from your home’s foundation and soggy parts of your yard. Think of it as an underground drainage highway. It’s a trench filled with gravel and a perforated pipe that collects surface and groundwater, channeling it to a safe exit point, like a storm drain or a dry well. This method is incredibly useful for dealing with persistent wet spots on your lawn or water pooling near your house after a heavy Texas rain. By intercepting water before it can cause soil erosion or foundation damage, a French drain acts as a powerful line of defense for your property.
While it sounds technical, installing a French drain can be a rewarding weekend project if you’re up for some digging. It’s a fantastic solution that can be a game-changer for protecting your investment. Before you grab a shovel, however, it’s crucial to have a clear plan. Proper installation is key to its success, ensuring you solve your water problems instead of accidentally creating new ones. This guide will walk you through the process step-by-step, from planning your trench to testing the final result. We'll cover the tools you need and the critical details, like getting the slope just right. Remember, for widespread or severe drainage issues, a professional assessment can save you time and ensure your drainage solutions are built to last and integrated correctly with your home's existing systems, like your gutters.
Tools and Materials
Before you start digging, let’s get your supplies in order. Having everything on hand will make the process much smoother. You’ll need a sturdy shovel or a trenching tool for the digging part. For the drain itself, gather a perforated drainage pipe (the flexible, corrugated kind works well), enough gravel or drainage rock to fill your trench, and a roll of water-permeable landscape fabric. This fabric is essential because it keeps soil and silt from clogging your pipe over time. You’ll also want a tape measure and a level to ensure your trench has the right slope for water to flow away properly. A wheelbarrow will be your best friend for moving all that dirt and gravel around. It’s a good idea to lay out all your tools and materials before you begin.
Step 1: Map Out the Trench
First things first: you need a plan. Walk around your yard and identify the highest point of your water problem. This is where your French drain will begin. Your trench should run through the soggiest parts of your yard, following a gentle downhill path. The goal is to lead the water away from your house foundation to a suitable exit point. This could be a storm drain at the street, a dry well, or another low-lying area of your property that can handle the excess water. Use spray paint or stakes and string to mark the exact path of your trench. This visual guide will keep you on track when you start digging and helps you avoid any surprises, like sprinkler lines or utility cables. Always remember to call 811 before you dig to have underground utilities marked.
Step 2: Dig the Trench
Now for the hard work. Following the path you marked, start digging your trench. A good rule of thumb is to make it about 6 inches wide and between 18 to 24 inches deep. The depth ensures you’re below the frost line and can accommodate enough gravel for proper drainage. The most critical part of this step is creating the right slope. Your trench needs to slope downward at a rate of about 1 inch for every 8 to 10 feet of length. This gentle decline uses gravity to keep water moving. Use your level frequently as you dig to check your progress. It’s a physically demanding job, so pace yourself, stay hydrated, and maybe enlist a friend to help. A clean, consistently sloped trench is the foundation of a successful French drain.
Step 3: Line the Trench with Fabric
Once your trench is dug, it’s time to line it with landscape fabric. This step is non-negotiable, as it’s what will keep your drain from getting clogged with soil and roots. Unroll the fabric and press it into the trench, making sure it covers the bottom and sides completely. Leave about 10 to 12 inches of extra fabric on both sides of the trench. You’ll use this excess material later to wrap over the top of the gravel, creating a protective burrito around your drain system. This simple barrier is the key to the longevity of your French drain, so take your time to get it right. It prevents the surrounding dirt from mixing with your gravel and compromising the flow of water.
Step 4: Add Gravel and Pipe
With the fabric in place, add a base layer of gravel about 2 to 3 inches deep along the bottom of the trench. Next, lay your perforated pipe on top of this gravel bed. Make sure the small drainage holes in the pipe are facing down. This might seem counterintuitive, but it allows water rising from the ground to enter the pipe and flow away. Once the pipe is positioned correctly, fill the rest of the trench with gravel, covering the pipe completely and leaving just a few inches of space at the top. The gravel provides a porous medium for water to travel through easily on its way to the pipe.
Step 5: Fill the Trench and Test Your Drain
Now it’s time to close everything up. Fold the excess landscape fabric over the top layer of gravel, overlapping the edges to completely encase the pipe and stone. This final layer of protection ensures your drain stays clear. You can then fill the remaining space in the trench with the soil you originally dug up, or you can top it off with sod or decorative stones for a more finished look. To make sure your new drain is working, run a garden hose at the highest point of the trench. Watch to see that the water flows into the drain and exits properly at the discharge point. If it does, you’ve successfully installed your French drain.
A Step-by-Step Guide to Installing a Catch Basin
A catch basin is a fantastic fix for those stubborn, swampy spots in your yard where water always seems to collect. Think of it as a drain for your lawn. It catches surface water and funnels it away through an underground pipe, preventing puddles and protecting your home’s foundation from excess moisture. While it’s a more involved project than adding a downspout extension, installing a catch basin is a manageable DIY task for a determined homeowner. Here’s how you can tackle it step by step.
Tools and Materials
First things first, let's get your supplies in order. You don't want to be halfway through digging a hole only to realize you're missing something crucial. For this project, you’ll need a shovel, a level, the catch basin itself, a drainage pipe, and enough gravel to backfill the hole. The catch basin and pipe are the stars of the show, collecting and redirecting the water. The shovel is for the digging, of course, and the level ensures your basin sits perfectly flat so it can drain efficiently. Finally, the gravel helps with water filtration and keeps your system from getting clogged with soil.
Step 1: Find the Lowest Spot in the Area
Before you start digging, you need to play detective. Walk around your yard, especially after it rains, and find the exact spot where water pools the most. This low point is where gravity naturally sends water, making it the perfect location for your catch basin. Placing it here allows it to do its job most effectively, capturing the maximum amount of runoff before it can create a muddy mess or seep toward your foundation. If you're unsure, you can use a string and line level to find the lowest point relative to the surrounding area. Mark the spot with a flag or stake so you know exactly where to start.
Step 2: Dig the Hole and Position the Basin
Now it's time to get your hands dirty. Using your shovel, dig a hole at the low spot you identified. You'll want to make the hole a bit wider and deeper than the catch basin itself. This extra space gives you room to work and to add a gravel base. Once the hole is dug, place a few inches of gravel at the bottom and use your level to make sure the surface is perfectly flat. Then, set the catch basin on top of the gravel. A level basin is key, as it ensures water flows into it correctly instead of pooling around the edges.
Step 3: Attach the Drainage Pipe
With your basin in place, the next step is to give the water an escape route. You'll need to dig a shallow trench leading away from the catch basin to a suitable discharge point, like the street or a less-trafficked area of your yard. Your trench needs to have a slight downward slope, about one-eighth of an inch per foot, to keep water moving. Attach the drainage pipe to the outlet on the side of the catch basin, laying it securely in the trench. This connection is the most important part of the system, as it’s what carries the water away and solves your drainage problem for good.
Step 4: Backfill and Test the Flow
You're in the home stretch! Once the pipe is connected, carefully backfill the area around the catch basin and along the trench with gravel. The gravel supports the basin and pipe while also allowing any excess ground moisture to filter through. Fill it up to a few inches below the ground surface, then cover the gravel with the soil you originally dug up. Before you call it a day, test your work. Pour a few buckets of water into the basin and watch to make sure it flows smoothly through the pipe. If it drains quickly, congratulations! If this process seems a bit overwhelming, remember that professional drainage solutions can ensure the job is done right.
Common Drainage Mistakes (and How to Avoid Them)
Fixing a soggy yard can feel like a huge accomplishment, but a few common missteps can put you right back where you started. Understanding these pitfalls is the key to creating a lasting solution that protects your property for years to come. Many homeowners find themselves tackling the same drainage problem over and over because they’ve accidentally skipped a critical step or misdiagnosed the real issue. By learning what not to do, you can approach your project with confidence and get it right the first time, saving yourself time, money, and a lot of muddy frustration. Let’s walk through the most frequent mistakes so you can steer clear of them.
Forgetting About Your Gutters
It’s easy to focus on the ground when you see puddles, but your roof is often the real starting point for your drainage woes. Your gutter system is designed to collect thousands of gallons of water and direct it safely away from your home. When gutters are clogged, damaged, or improperly installed, they can’t do their job. The next time it rains, take a look outside. If you see water overflowing the sides of your gutters or pouring from downspouts right next to your foundation, you’ve found a major culprit. This overflow is a primary cause of foundation water damage and saturated soil, making your gutter system the first place you should inspect.
Installing a System Without a Clear Plan
When you’re staring at a swampy yard, the urge to just start digging is strong. However, installing a drainage system without a solid strategy often leads to failure. A successful solution requires you to create a clear plan based on your yard’s unique challenges. You need to know where the water is coming from, how your yard slopes, and what kind of soil you have. A French drain installed in the wrong spot or a catch basin that’s too high won’t solve anything. Faulty installation can waste your investment or even make drainage worse, so take the time to map out your approach before you ever pick up a shovel.
Treating the Symptom, Not the Cause
A puddle in your yard is a symptom, not the disease. Simply installing a drain where water collects might seem like a fix, but it often fails to address the root cause. The real problem could be heavily compacted soil, improper grading across your entire property, or runoff from a neighbor’s yard. If you only treat the soggy spot, water will likely find a new low point to gather, and you’ll be stuck in a cycle of temporary fixes. Digging deeper to find the underlying reason for water buildup is essential for preventing these issues from causing long-term problems like mold, mildew, and serious structural damage to your home’s foundation.
Trying to DIY a Complex Problem
While some drainage solutions like downspout extensions are great weekend projects, more complex issues often require a professional touch. Problems like widespread poor grading or soil that’s so compacted it acts like concrete are not simple DIY fixes. Attempting a large-scale project like regrading your yard or installing an extensive French drain system without the right equipment and expertise can lead to bigger problems. You could accidentally damage underground utility lines or even make the water flow back toward your house. Knowing when to call for a professional assessment is key to ensuring the job is done safely and effectively, protecting your home and your investment.
The Critical Link Between Gutters and Yard Drainage
It’s easy to overlook your gutters when you’re staring at a soggy lawn, but they are often the main character in your yard’s drainage story. Your roof collects a massive amount of water during a Texas downpour, and your gutter system has one job: to control that water and direct it safely away from your home. When that system fails, it doesn't just cause a little overflow; it creates the perfect conditions for the very drainage problems you’re trying to solve. Before you invest in complex and expensive landscaping solutions, it’s critical to make sure your gutters are working for you, not against you.
How Faulty Gutters Create Yard Water Problems
Think of your gutters as the starting point for your entire drainage plan. If they are clogged with leaves, damaged, or improperly installed, they can’t function correctly. Instead of channeling water to the downspouts, they will overflow, pouring water directly alongside your foundation. This concentrated flow of water is a recipe for disaster. It quickly leads to soil erosion, washing away your mulch and landscaping. Even worse, that pooling water saturates the ground right where your home is most vulnerable. Consistent moisture can cause foundation shifting and cracking, leading to costly structural repairs. A routine gutter cleaning can often prevent these issues before they start.
Why New Gutters Can Be the Best Drainage Solution
Sometimes, the most powerful drainage solution isn't buried in your yard; it's attached to your roof. If your home has old, undersized, or damaged gutters, other drainage fixes may only be temporary bandages. Installing a modern, high-quality gutter system addresses the problem at its source. A properly designed system ensures that every drop of rainwater is captured and directed through downspouts and extensions far from your foundation. For many homeowners, a new seamless gutter installation is all that’s needed to resolve persistent soggy spots and protect their landscaping. It’s the most effective first step in managing stormwater and safeguarding your property’s value.
Know When to Call a Drainage Professional
While tackling a weekend project can be satisfying, some yard drainage issues are simply too complex for a DIY fix. Knowing when to step back and call a professional isn't admitting defeat; it's making a smart investment in your home's long-term health. If your efforts aren't solving the problem or the issue seems overwhelming from the start, bringing in an expert can save you time, money, and a lot of headaches. A professional can accurately diagnose the root cause and design a solution that lasts.
So, when is it time to make that call? Watch for a few key signs. If you have persistent standing water that turns your lawn into a swamp or makes gardening impossible, it’s a clear signal that the problem requires a more robust fix. Another major red flag is water pooling near your home's foundation. This often happens when gutters overflow or downspouts dump water right against the house, which can lead to serious foundation issues. You should also consider a professional if you suspect the problem is related to poor property grading or heavily compacted soil, as these issues often require specialized equipment and expertise to correct.
If you’ve already tried a DIY solution that didn't work, or if a recently installed system is already failing, it’s time for a second opinion. A faulty installation can cause more harm than good, and an expert can assess what went wrong. Ultimately, a professional provides comprehensive drainage solutions that address the underlying cause, not just the symptoms. When you're facing widespread erosion, water damage threats, or complex soil problems, calling a drainage specialist is the most effective path forward to protect your property.
Frequently Asked Questions
My yard is always soggy after it rains. What's the very first thing I should check? Before you start planning a major yard project, look up. Your gutter system is the first line of defense against water problems. Walk around your house during the next rainstorm and see if your gutters are overflowing or if water is dumping from downspouts right next to your foundation. Clogged or damaged gutters are often the primary source of excess water in a yard, so ensuring they are clean and functioning correctly is the most important first step.
What's the difference between a French drain and a catch basin? They sound similar. That's a great question because they solve different types of water issues. A catch basin is like a drain for your lawn, designed to collect surface water from a specific low spot, like a persistent puddle in your garden or near a patio. A French drain, on the other hand, is a more extensive underground system that collects groundwater over a larger area, making it ideal for solving widespread sogginess or protecting a foundation from subsurface water.
My yard is completely flat. Will any of these drainage solutions even work for me? Yes, absolutely. A flat yard presents a unique challenge because water has no natural path to follow, but it's a solvable problem. For flat properties, solutions often involve creating a slope where one doesn't exist. This might mean installing a French drain or a dry creek bed with a carefully calculated slope to guide water to a safe exit point. In some cases, minor regrading combined with a catch basin or dry well can effectively manage the water.
I've extended my downspouts, but I still have water pooling near my foundation. What's my next step? It's smart that you started with your downspouts, as that's a critical first fix. If water is still pooling near your foundation after extending them, it points to a more complex issue. The problem could be compacted soil that can't absorb the water or improper grading that directs water back toward your house. At this point, it's a good idea to get a professional assessment to identify the root cause and determine if a solution like a French drain or regrading is needed to protect your foundation.
Can a poor drainage system really damage my home's foundation? Yes, and it's one of the most serious consequences of ignoring water issues. When water constantly pools against your house, it saturates the soil. This creates immense hydrostatic pressure that can push against your foundation walls, leading to cracks, leaks, and long-term structural instability. Over time, this can cause very expensive damage, which is why addressing yard drainage is not just about having a nicer lawn; it's about protecting the core structure of your home.